


Restore Old Windows
In case you didn’t know this already, I’m not a contractor or an architect or any sort of official home renovator, but now I know how to restore old windows. In the end, I’m just a little lady with a hammer and a whole lot of grit. 😉 BUT, I have learned a thing or two along the way.
I receive so many questions either about the process of restoring an old home or making a new home look older. I figured it was time to start spreading the wealth and share what I’ve learned (which will save you a few steps too.) My newsletter people have received the top five ways I have brought character to my new build home so be sure you sign up and join our weekly fun!
Step One: Call Dad
Hah! But seriously, my Dad is amazing and has been at this cottage every day with me. We’ve had a lot of fun and I’m pretty sure we’re both going to sleep for a week straight when this is all said and done. Back to the windows…
Every single person I’ve taken to the Carolina Cottage has tried to talk me into ripping out the original wood windows and replacing them with vinyl. If there’s one thing I learned when we were building our home (which is a new build remember), is most contractors will try to talk you into what is easiest for them (#sorrynotsorry.)
To be honest, I ended up regretting some of the choices I made in my own home because I let someone dissuade me from my original ideas. Well, now I know better!
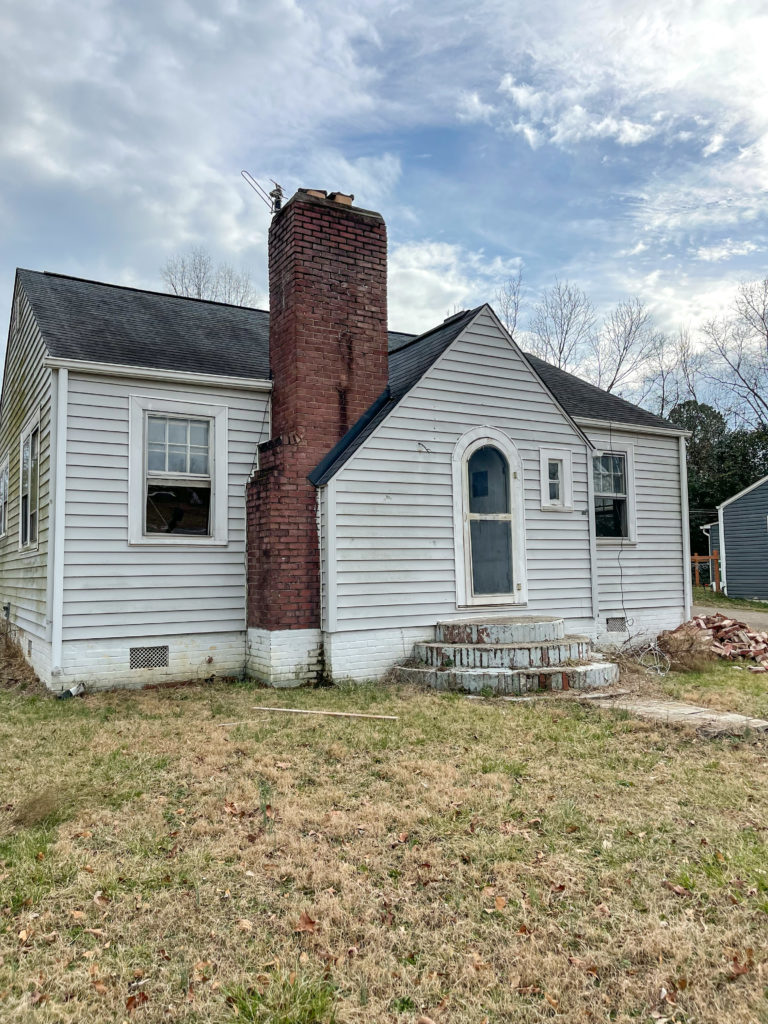
The Carolina Cottage still had her original windows with the old wavy glass mostly intact (which is pretty amazing.) I have been determined to keep these windows and find a way to make them work. There is nothing worse than vinyl windows in a beautiful old home. It’s like wearing flip flips with a dress suit…just doesn’t look good.
Check Before You Start to Restore Old Windows
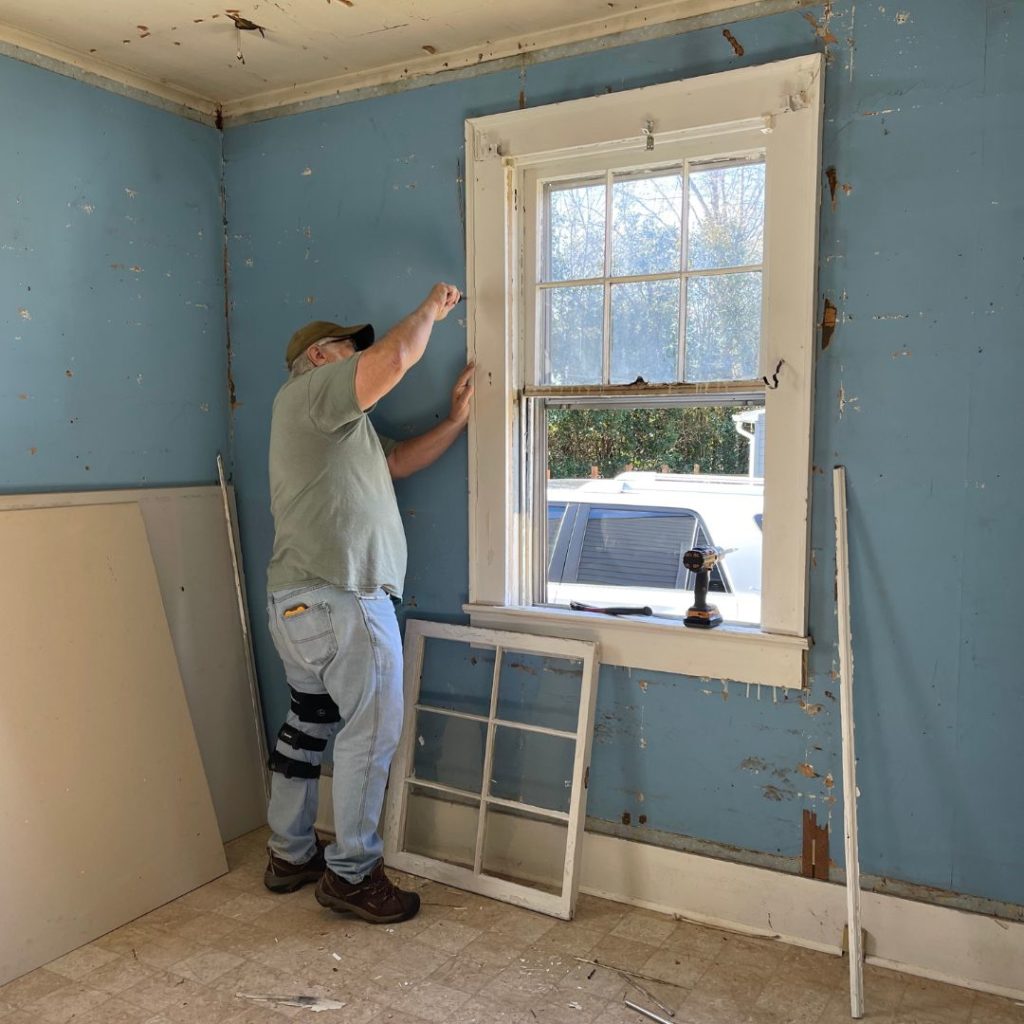
Before I could really make a decision about using the original windows I had to check the condition of the casing and trim (the framing.) After pulling back the vinyl siding (I’m 90% certain that’s what causes the issues with wood windows anyway) we found rot. It looked scary initially, but after inspecting, most of the windows only needed 1-2 replacements boards on the surface. The reason for the rot you ask? The vinyl siding trapped water on the wood. So see, I was right about that vinyl!
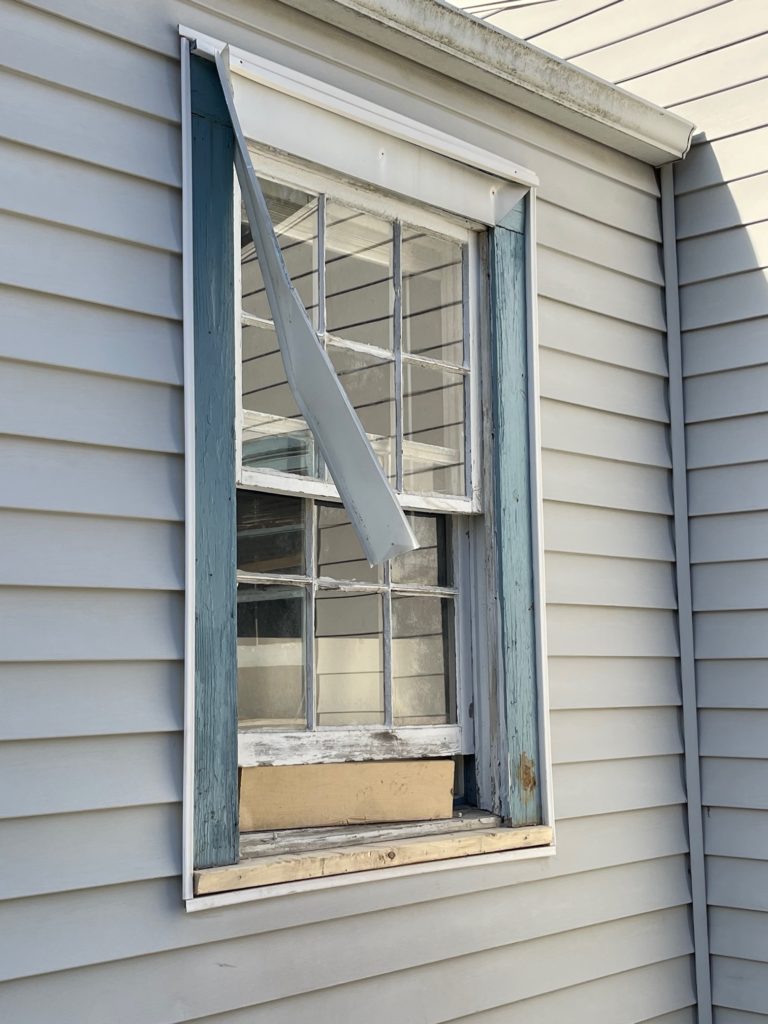
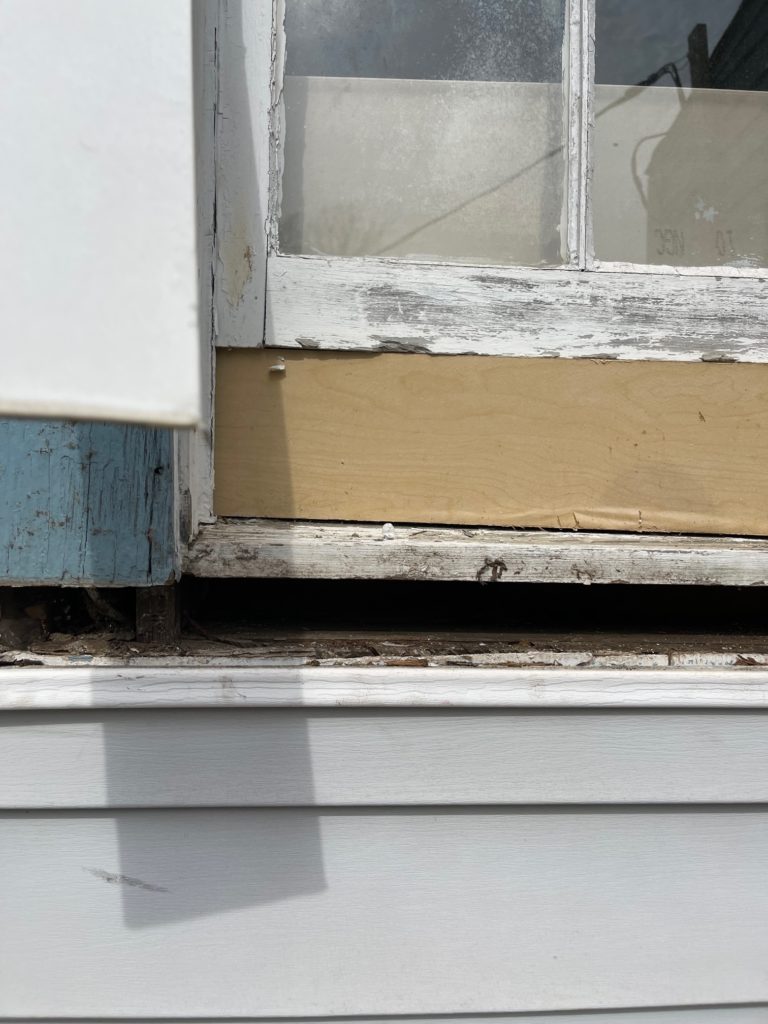
My Dad did most of the work on the actual windows. Mark’s Uncle Donnie worked on the casing and trim on the windows. I’m so thankful for both of them, but especially my Dad. He would work on one room at a time. The work was so tedious and time consuming. But now we have all the windows restored and they actually function!
A Little Window History
If any of you have lived in an older home, you know many times windows get painted shut (most of these were.) If the windows weren’t painted shut, they wouldn’t function properly because over time the window weights dropped from the sash cord. In case I lost you with the sash and weights here you go:
Weights and chains have been used to operate windows since the early 1700’s. This system has stood the test of time due to its sheer simplicity. And double-hung windows are usually either operated by a weight and chain system or spiral balance system. Windows operated by weight and chain (or weight and pulley), have a chain/cotton cord that connects the sash to a weight that is concealed in the wall next to the window.
AND sash weights create the proper counterbalance for each window sash, allowing for smooth operating double-hung windows. Modern homes don’t require these pieces anymore actually because new technology just uses steel coils or spring balances. Don’t worry we had to Google all of this too!
Since we had never done any of this before, we watched this recommended video from WoodWindowMakeover my friend Heather suggested. Heather is an old house contractor and a wealth of knowledge. I was thankful to be able to ask her questions (THANK YOU HEATHER!)
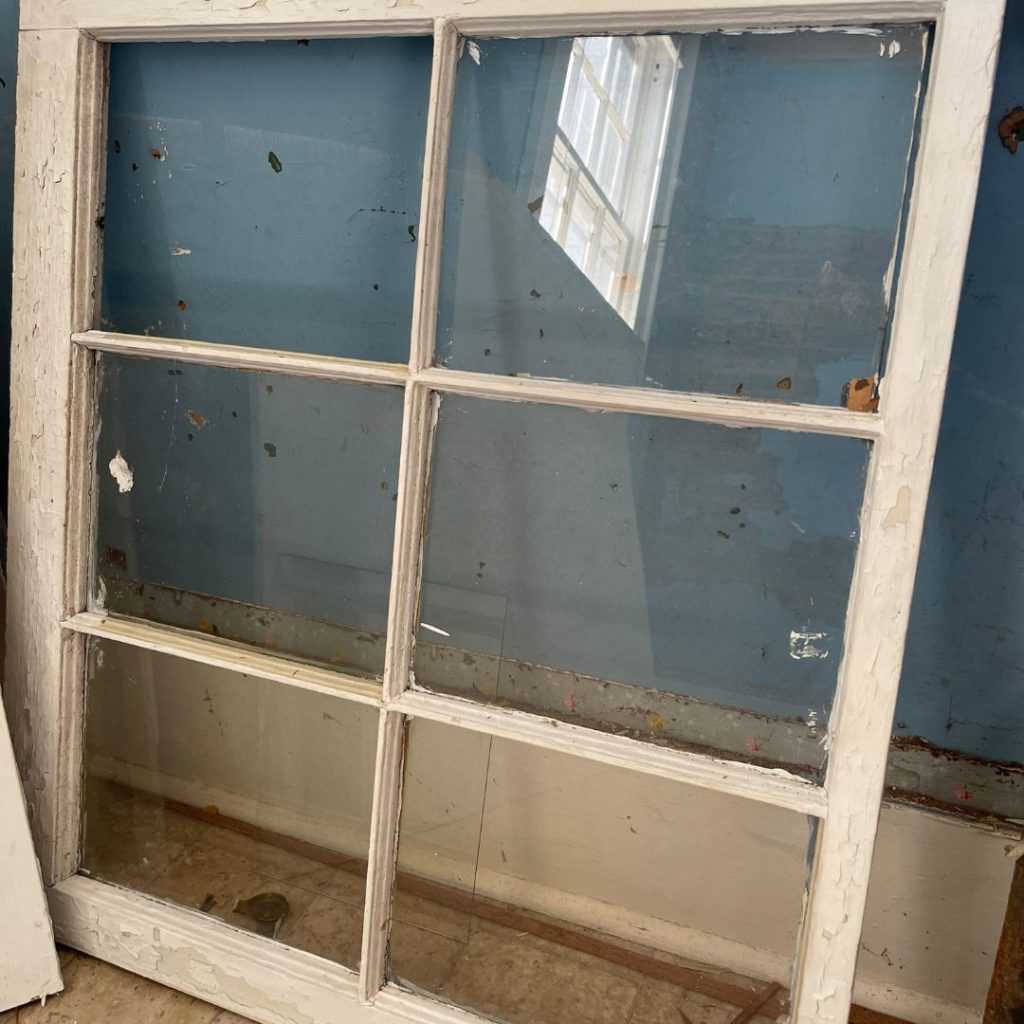
Glass Restoration and Supplies
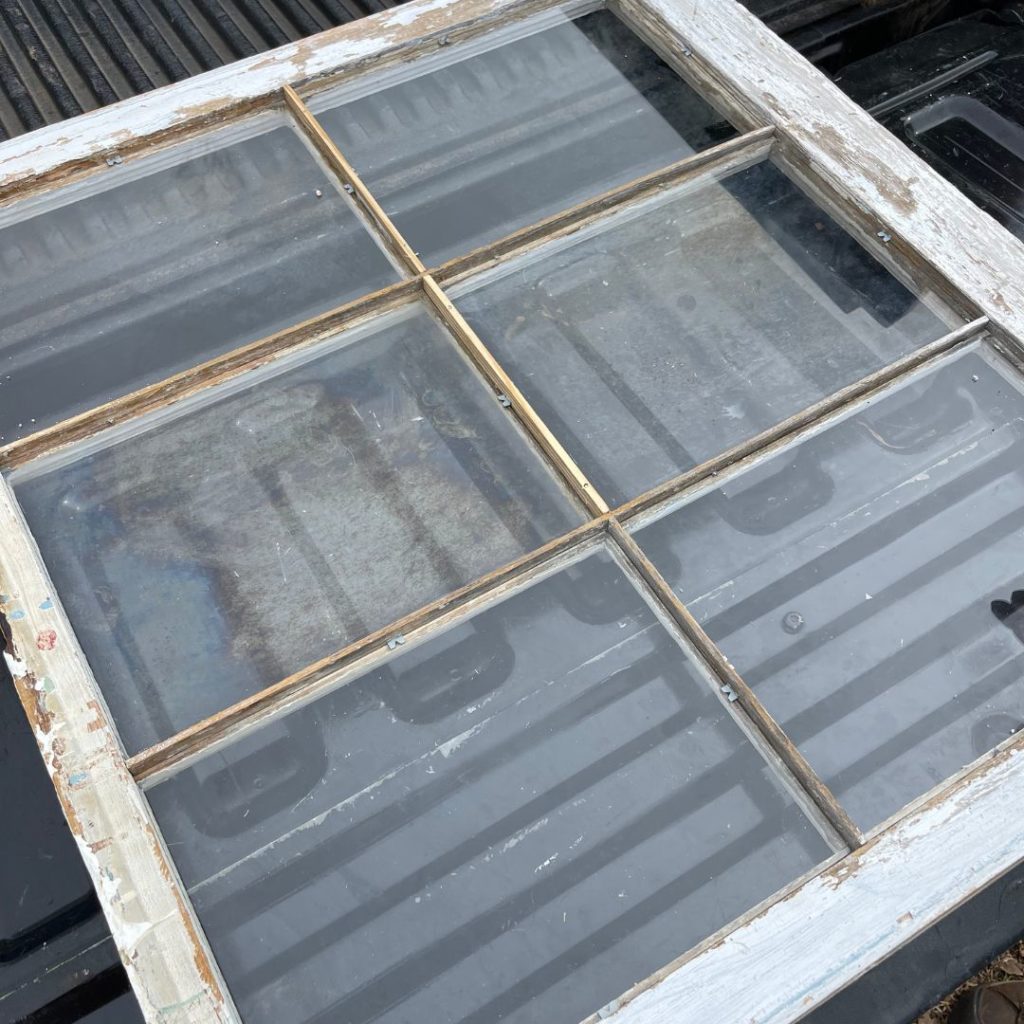
While we worked to replace casings and trim, some of the wavy glass was not going to be salvageable. In the image above you can see the “points” we used to hold the new glass in place. After being repointed, we reglazed around each window pane (you can learn more about that process here and see the supplies I used here.)
In the end, saving the original windows was time consuming but we saved THOUSANDS!! Fixing the windows cost us less than $300 in materials. And they look SO much better!
I’ve rounded up the products I used in case you are in the midst of a full restoration or need a few elements to make your windows look a little more “historically inspired.” If you are completely missing the weights for your windows, I found these sash weight replacements that would work. For glazing putty, the kind in the tube is a lot easier to apply, but pricer. It only covered 1-2 grids in my window and ended up not being worth it so I recommend this putty and putty knife.
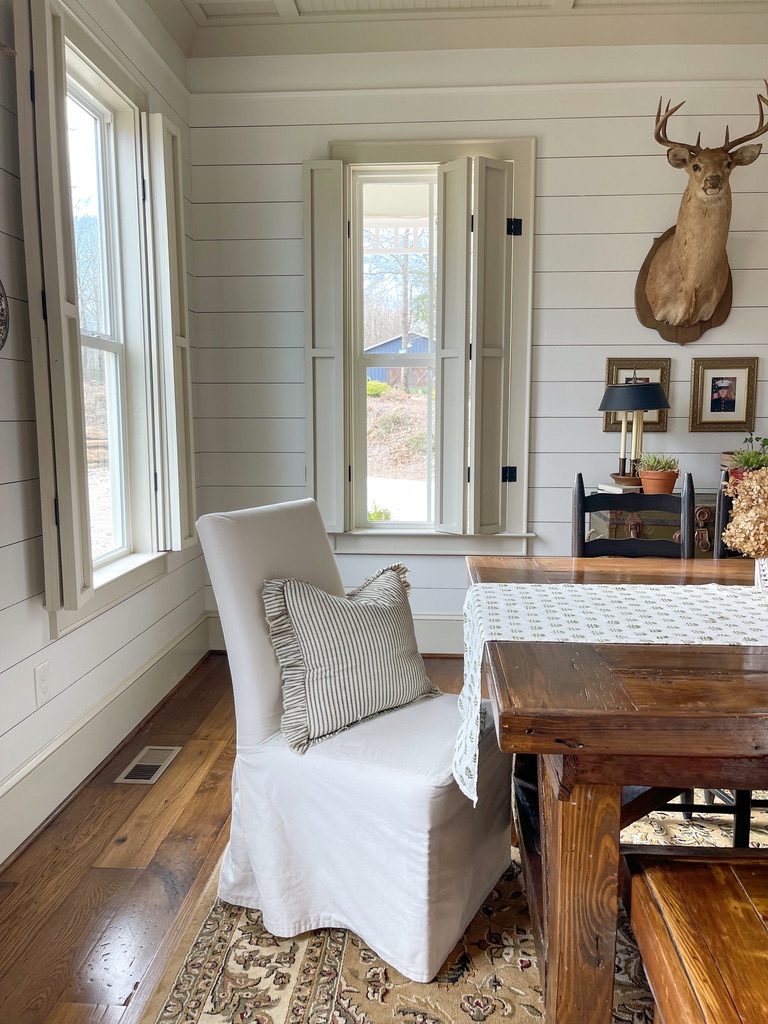
Add a little PIZAZZ: Shutters
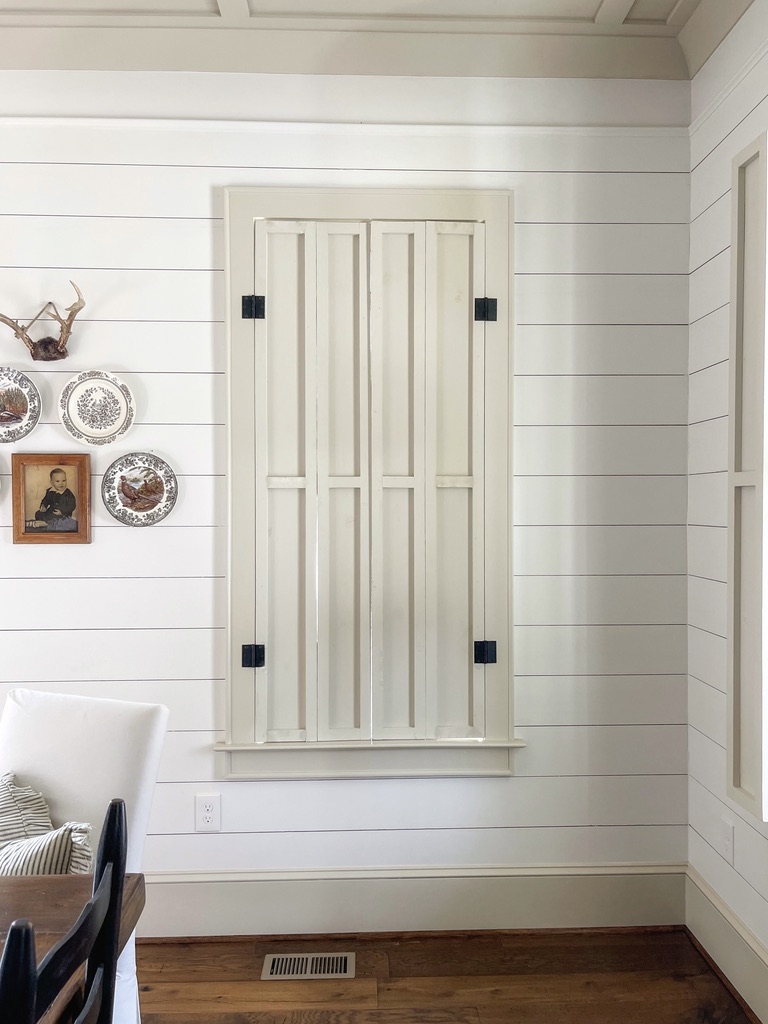
Now, I don’t know if I’ll add these to the Carolina Cottage, but thought they were worth the mention if we’re discussing old windows. My Dad actually made these shutters for me while we were still in the building phase of our own home. I spent so much time recreating old house looks that I didn’t want to cover up the window casing and trim with curtains or blinds. After some research, I discovered some older homes with interior shutters and asked Dad if he thought he could recreate something like those. Of course my Dad said he could create such a thing (told you he is amazing!) After he built them (you can read all about how he did that here), I painted them my favorite trim color to match the rest of my home- Edgecomb Gray by Benjamin Moore.


I no longer own a property but, what a font of information. Restoration is so important for us and the next generation! New is not the only way to go nor, is it the best necessarily.
Growing up in a Victorian from the 1800s, I know the quality of materials and workmanship that went into older homes. We had3 fireplaces on the 1st floor. Only one was functional. Two sets of solid wood pocket doors, marble sinks. It was grand.
It seems like fixing what you’ve got is becoming a lost art. People are so quick to just throw it away and replace.
Love all the old house details in your home! And cannot wait to see the Carolina Cottage in all her glory when you are finished!!
Thank you so much! I told Mark I almost want to live there! lol
So excited to see your love and hard work finished. It’s going to be beautiful💖🤗
Thank you for sharing your knowledge! Going through the same decision process for a mountain home we own!!
Every situation is unique and I totally understand the need to replace in certain circumstances, but I’m all for saving the original character and history where possible.
Favorite line
“It’s like wearing flip flips with a dress suit…just doesn’t look good.”
You are so right.
Good for you and thanks for spreading the word!