


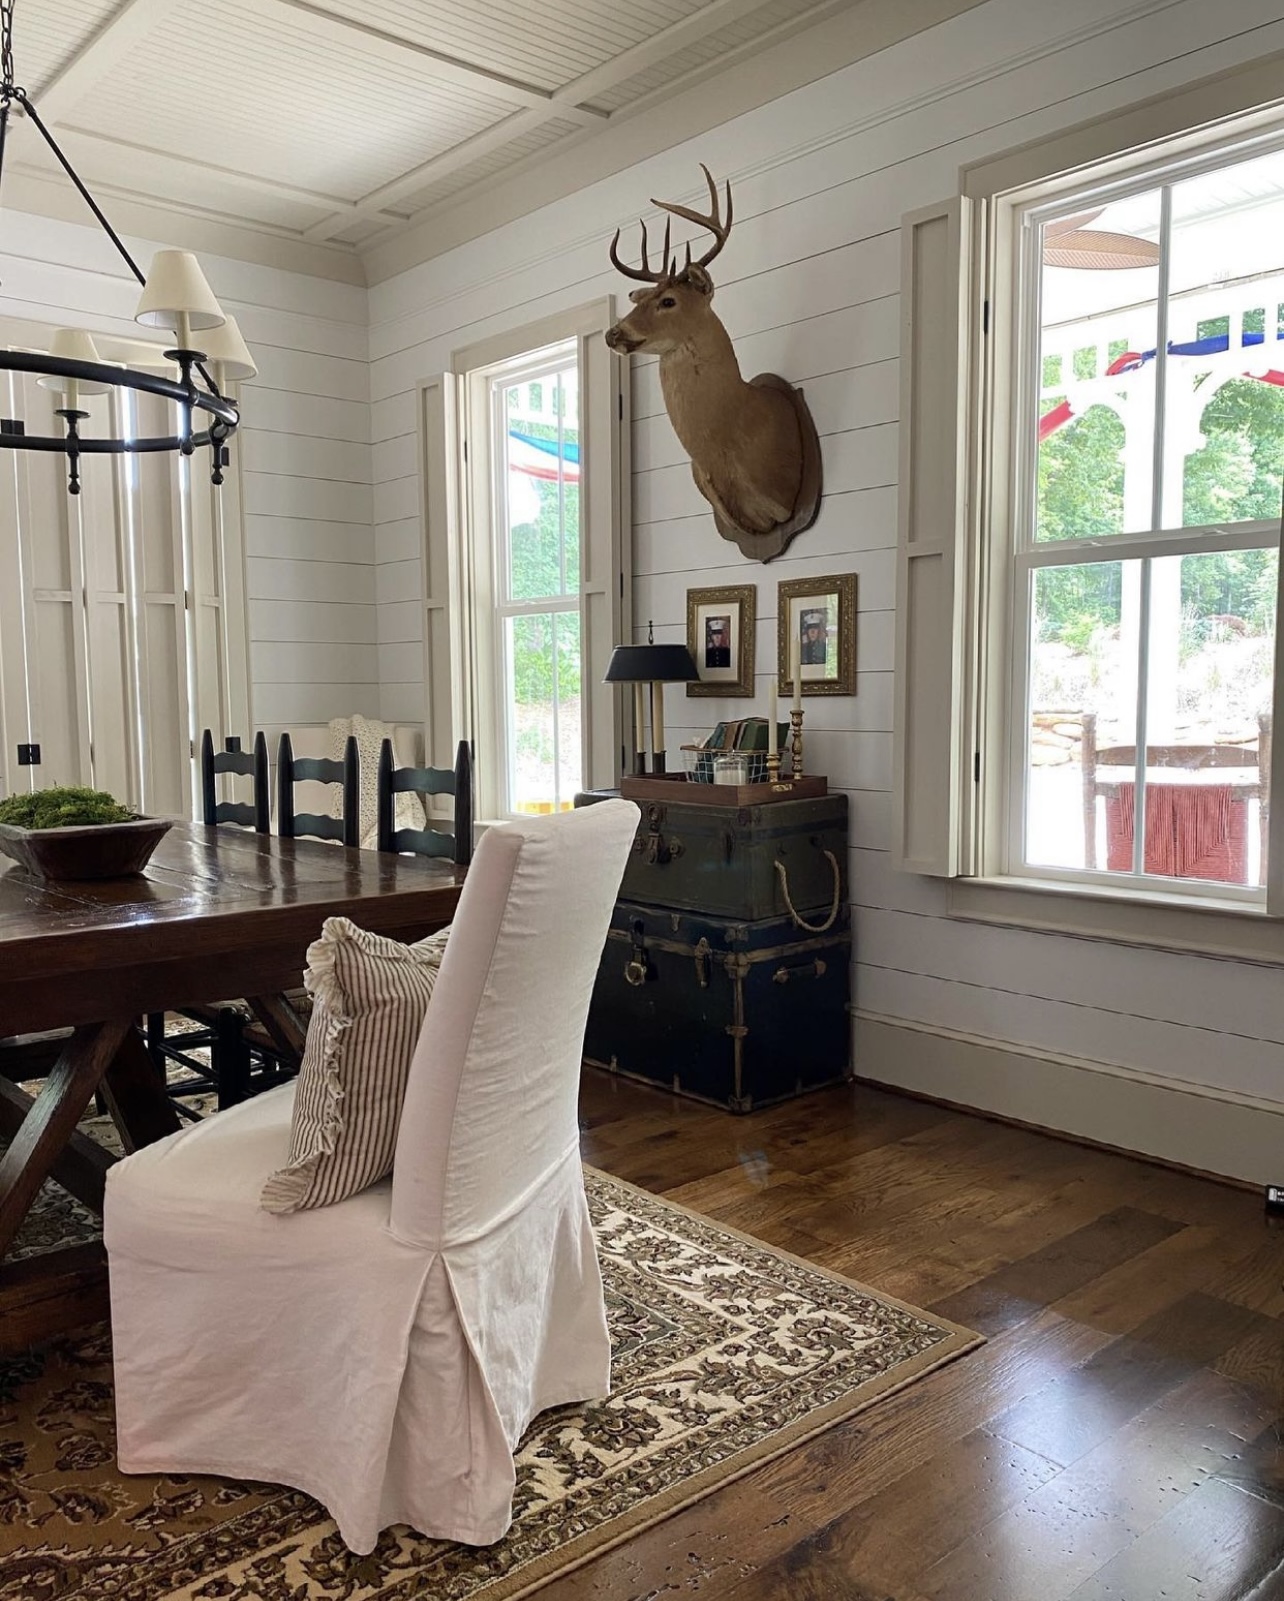
Historically Inspired
We finished building our new “old” home in 2018. Before our build, I spent a lot of time researching trim styles and I put a lot of thought into the woodwork and trim of our home. When it came time to move in, I realized that I needed some privacy on some of our windows, but I didn’t want to cover up the beautiful trim work that I had just worked so hard on. I was browsing the internet one day for inspiration and came across a historic home and I noticed it had interior shutters. I thought, “THATS IT!”. I like the idea a lot because it doesn’t hide or take away from the beautiful detail, it only adds to it.
I’m going to try my very best to articulate how my Dad built these. You see, he and I are a team. I think it up and he builds it. I’m a very lucky girl, I know. I’ve just recently started picking up the power tools myself, but I am nowhere near the craftsman that he is. My hope is that one day I can build these all on my own. Ok, Here we go.
What you will need for this project
Lets start with materials and tools used. Keep in mind this is for the size of the window in my home. You may need more or less depending on the window you are creating shutters for.
- 4-1″x6″x8′ unfinished pine board
- 10-3-1/2″ Black square mortise door hinges
- 8- 1″x2″x8′ Square unfinished pine board
- wood filler
- wood glue
- paint or stain
- Trim nail gun
- Small compressor for nail gun
- Brad nails
- Chop saw or circular saw
- Small hammer
- Cordless drill
- Drill bit that is slightly smaller than hinge screws
- Driving bit that matches hardware with hinges
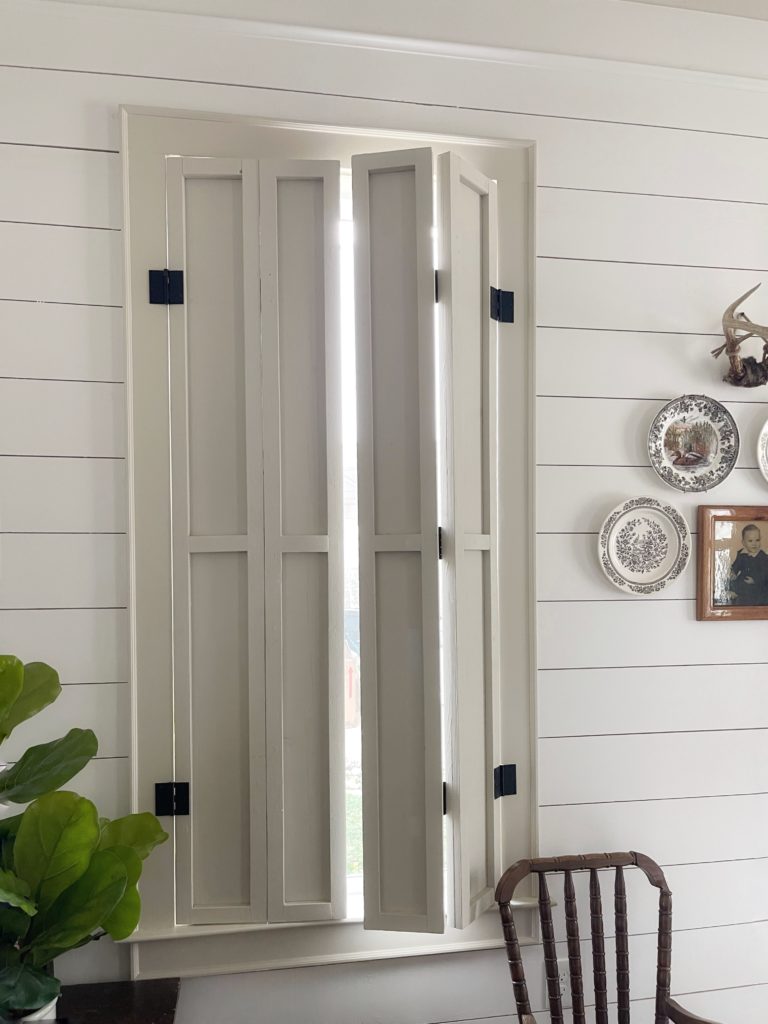
We chose to make the shutters bifold
In my dining room, the shutters are typically always opened. So, we chose to make the shutters bifold. This way they don’t take up a lot of my wall space when not in use. You can skip the bifold if your space doesn’t require or if you just prefer it without.
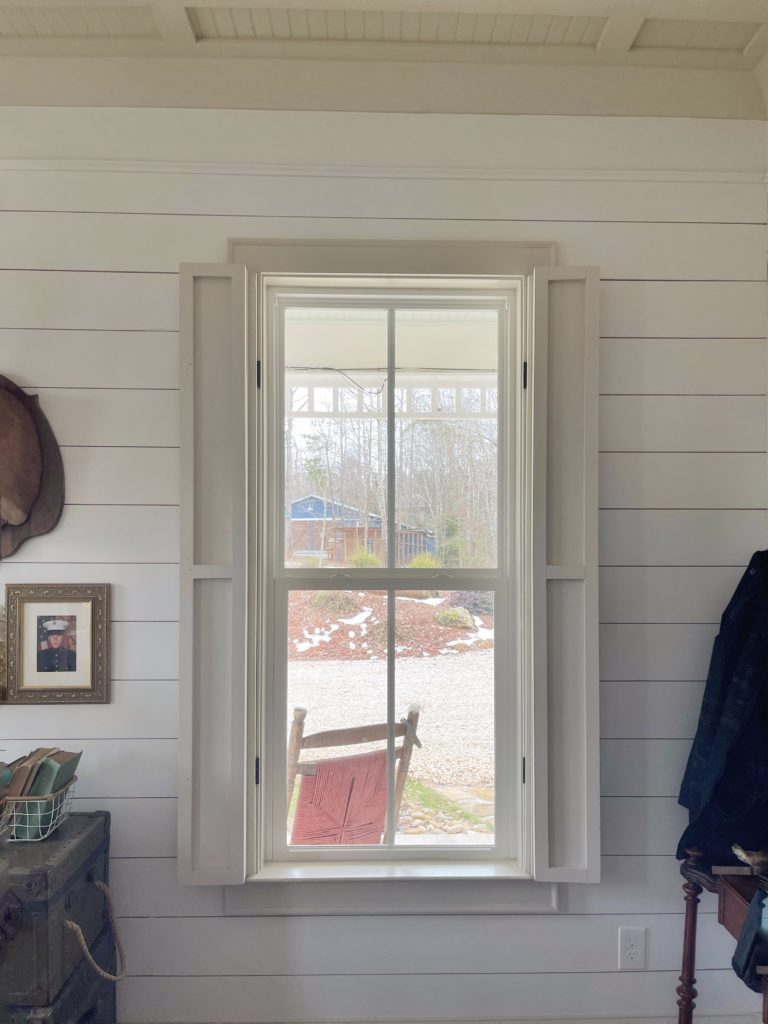
Measurements
The first step for this is going to be getting your measurements and that is going to be unique to your windows. While gathering your measurements (these are flush, inside mounted shutters) be sure to remember to deduct for 1/4″ clearance to each side. For example, the total inside height of my window is 70″ so my measurement for my shutter should be 69 1/2″.
Begin assembly
Find a good spot to lay your materials out to begin assembly. The materials provided will create 2 bifold shutters for one window. First, you’re going to cut your 1″x6″x8′ boards to match the length you’ve just measured taking into account the clearance deduction. Then take your 1″x2″x8′ square trim boards and cut those to fit around all four sides. We started with the longest lengths first and then added the top bottom and center boards to cut down on waste. We assembled our pieces using wood glue and 1 1/4″ brad nails with a nail gun.
Paint or Stain
After you’ve assembled your shutters, now is a great time to go ahead and paint them if you chose to do so. I painted mine Edgecomb Grey by Benjamin Moore. It is so timeless and the perfect mixture of grey and beige, in my opinion.
Time to add the hinges
You are ready for hinges. We started with the hinges for the bifold. Flip your shutters over to the now flat side to add these hinges. These will only be visible from the exterior of the house when fully closed. You will be using 6 of your hinges here, 3 on each set of bifold shutters (this is also dependent on how long your shutters are, you may need less). You’re going place these where they will best structurally support your shutter. For mine, I placed my first hinge in the center and then one 10″ front top and one 10″ from the bottom. Be sure to drill a pilot hole where your screws will go. This prevents the risk of splitting the wood and ruining your soon to be masterpiece. Repeat this for each set of bifold shutters.
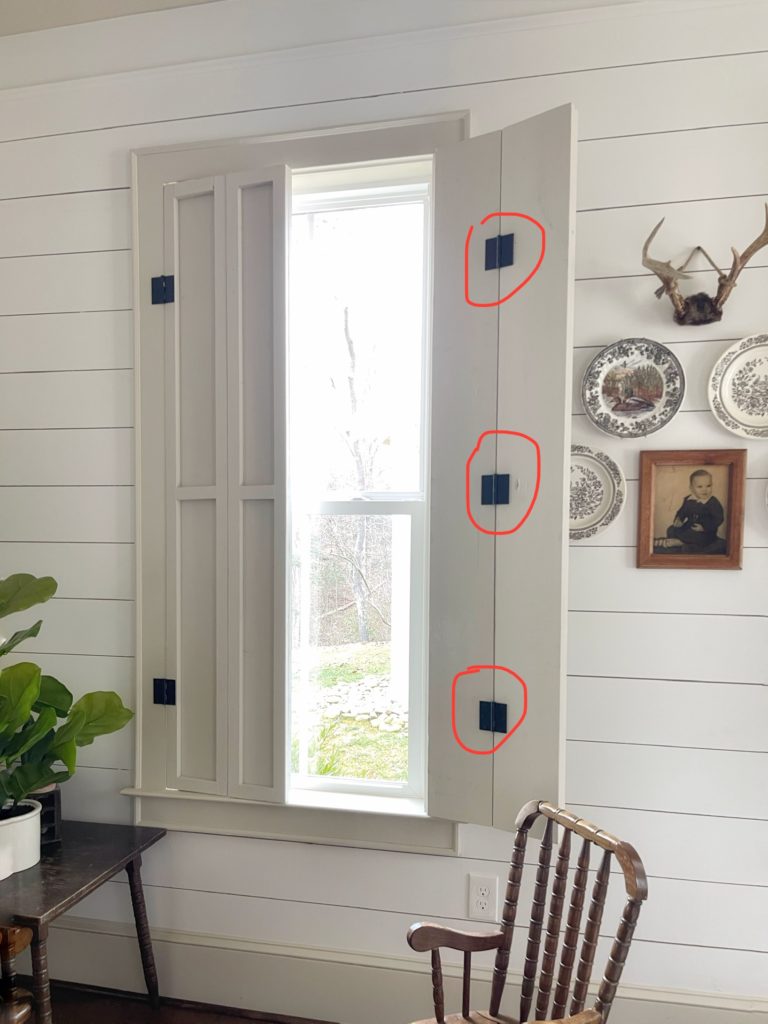
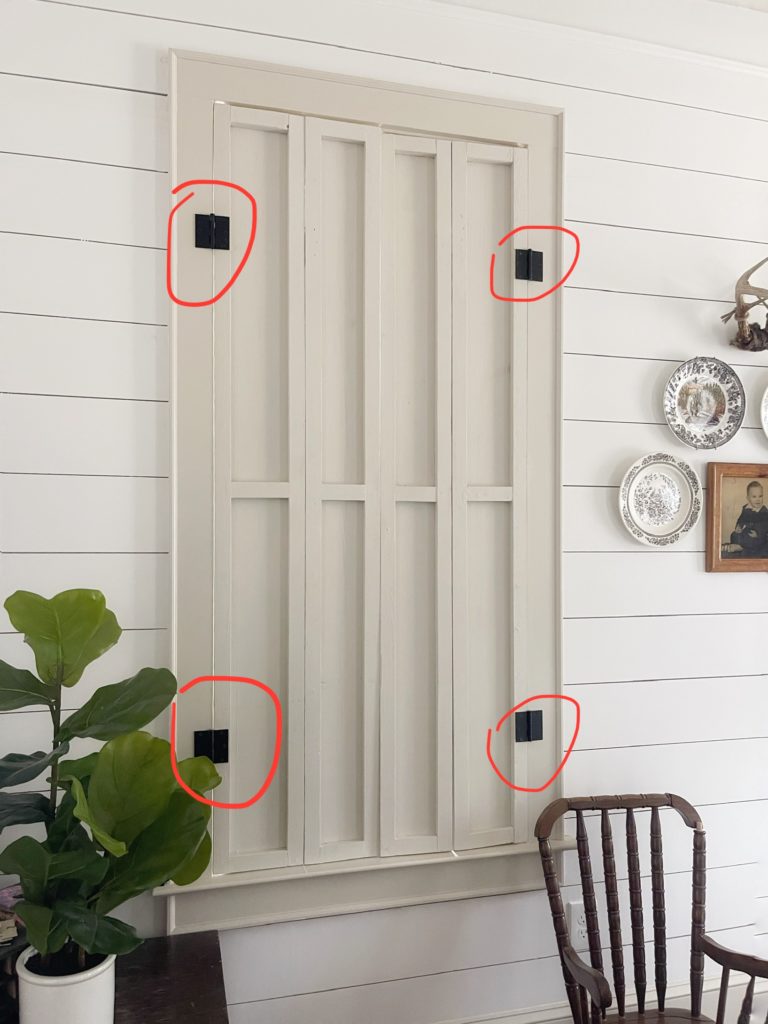
Next, you’re going to attach the 4 hinges that will attach to your window trim, 2 on each set. We also placed these hinges 10″ from the top and then again 10″ from the bottom of the shutter. I chose not to add a center hinge here because it wasn’t necessary structurally and also I felt it looked cleaner.
Install!
Its time to take them inside! It’s much easier to have a second set of hands for this part. Have someone hold your shutters in place making are you aren’t going to be scrubbing at the top or the bottom. If you are scrubbing, don’t fret. Take and cut or sand them down a bit until they are not. While holding in place, screw your hinges into your trim work. Repeat this for the other set.
You should now have a beautiful set of working bifold shutters!
Xoxo,
Brittany


I would love these…please send me your dad. 😉
I wish I could clone him! He is such a blessing.
These are so awesome. I have wanted interior shutters forever but honestly with all the diy I do I never ever thought of doing them myself. Thanks for this blog. Love your style.
You got this girl! Thank you so much!
How much per window did this cost? This is insanely beautiful!