


DIY Teacup Nightlight How To
I came up with the idea to create a DIY Teacup Nightlight while I was out browsing an antique mall. One Saturday afternoon, I passed by a sweet little teacup nightlight and was so inspired to make one of my own. You know I love saving money and DIYing pretty things too!
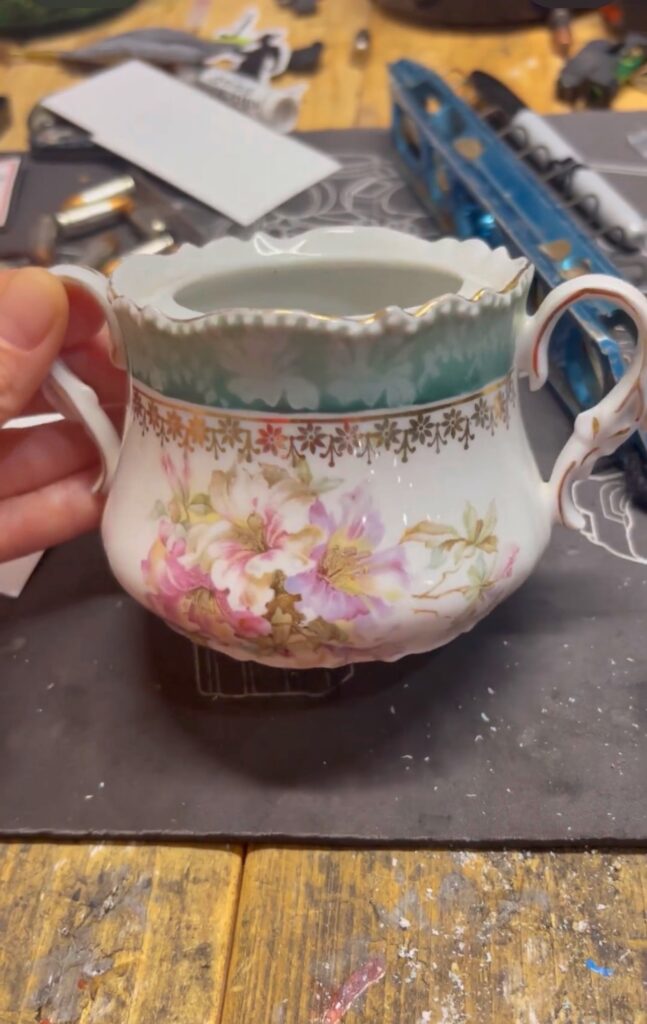
Over the next few days, I went thrifting for cute teacups, sugar bowls and anything I thought I could turn into little night lights. I ended up finding the perfect little sugar bowl to attempt my first nightlight. I was so excited about my find! I went home and dug around in our barn to see what tools we had so I could get started.
DIY Teacup Nightlight Next Steps
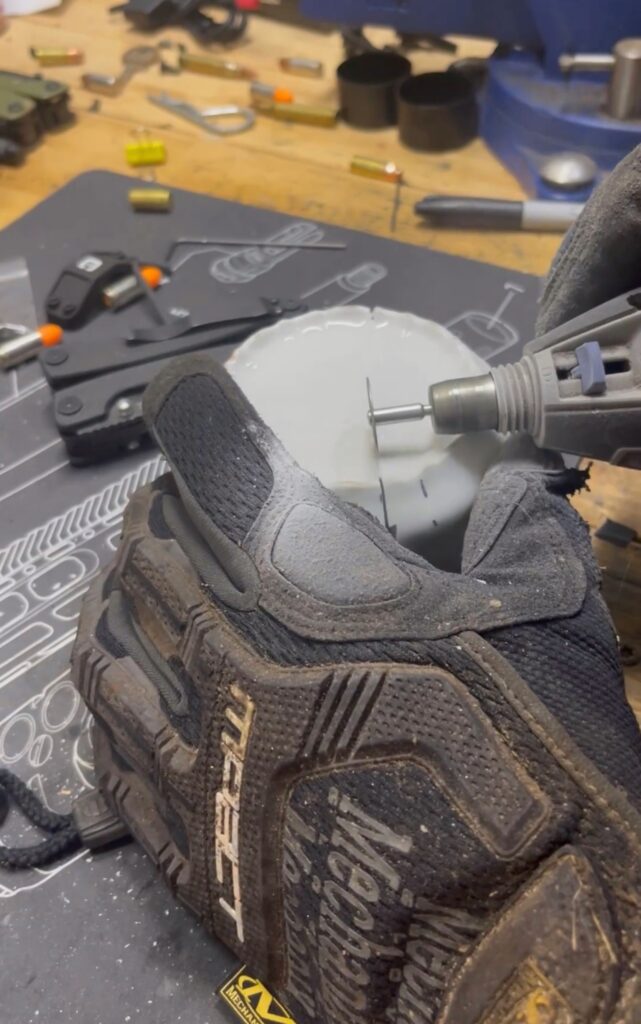
Since I knew I would be dealing with sharp tools and porcelain materials gloves were a must. I really like this pair! My hands are on the small side and these gloves aren’t too bulky. I also used these googles so the small shards didn’t fly into my eyes!
I already owned a Dremel Tool when I started so I decided to go that route. You’ll need the diamond wheel for cutting glass or porcelain. {Dremel Tools actually are not that expense, $25 or less! This is another dremel option too.}
Once I started, the process was pretty straightforward and simple. The trickiest part is being patient and take your time making cuts (which I’m terrible at)! There are no redos really. I would say it took me about 30 minutes from the time I started to the drying phase.
After that first one, I was hooked! The nightlights just turned out so cute. The process was fun and they are honestly were rewarding to make too.
Leveling Up the Teacup Nightlight Process
I was instantly hooked and wanted to see what else I could I do! So I did a little research and decided to buy a tile saw second hand so I could make more lights, faster. Of course, then I ran back out to the thrift stores and grabbed boxes full of cups, sugar bowls, tiny tea pitchers and more. The creative juices were flowing! The vision and shopping were so fun to do. The possibilities felt endless on what I could create… or so I thought.
After I got started with the variety of options I chose, I discovered not all cups are created equal. I learned that the thinner the cup, the easier it cuts (which seems so obvious now). I didn’t even pay attention to how thick the porcelain or glass was initially. In the end I found out, it’s nearly impossible to get through some of them without burning up your tools!
The tile saw height plays a big factor as well. I had to turn the cups and bowls several ways in order to get them cut in half because the tile saw will only allow for cups that are within the saw blade height. While the tile saw is awesome, for those larger pieces, it made the process harder and took a lot of time. My best advice if you are going to try this, is keep the cups, bowls, etc, small and thin!
DIY Teacup Nightlight Step by Step
Now that you know how I even started on this DIY Teacup Nightlight Project and my lessons learned, here’s the full process.
I start out by cleaning each tea cup or bowl really well. Then I take a sharpie and make a little mark each side of the cup to keep myself straight while using the Dremel. Using the Dremel, start at the bottom of the cup or bowl and make your cut. I like to start in the center and work my way down one side, then go back and cut the other side.
Prep for Lighting
Once you’re cup has been cut you need to add a spot for your light to fit into. When I made several nightlights at a time, I used a Diamond Drill Bit because Mark already had a Drill Press. The press makes it much easier if you are making cups on a larger scale, but if you don’t have access to one of those, the Dremel works great.
The downside of a Dremel, is that it can’t perfectly make pretty half circles. Truthfully, nobody is looking at that aspect anyway since the cut is on the bottom and your nightlight will be glued right into it. {I just know it’s not a perfect circle 😂.}
If you are using a Dremel to make the night light cut out, I recommend cutting a little triangle shape into the bottom first. After you have that initial cut into the cup, it is much easier to round out those lines with your Dremel. {Pro tip, start small and then you can always take away more if needed, but you can’t undo what you’ve done.}
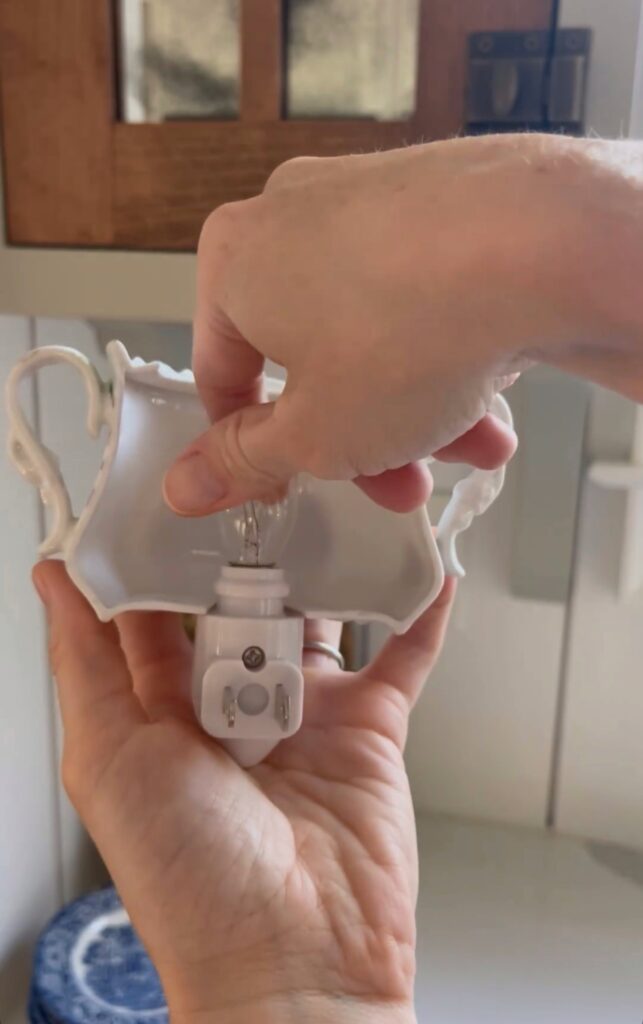
Adding the Light
After I rounded out those straight lines and created my half circle, I place the light where it will be glued into the cup to see if its a good fit {before I actually glue it.} This way, if i need to take a little more then I can before anything is final. Repeat until you have a cut out that your light can be glued into!
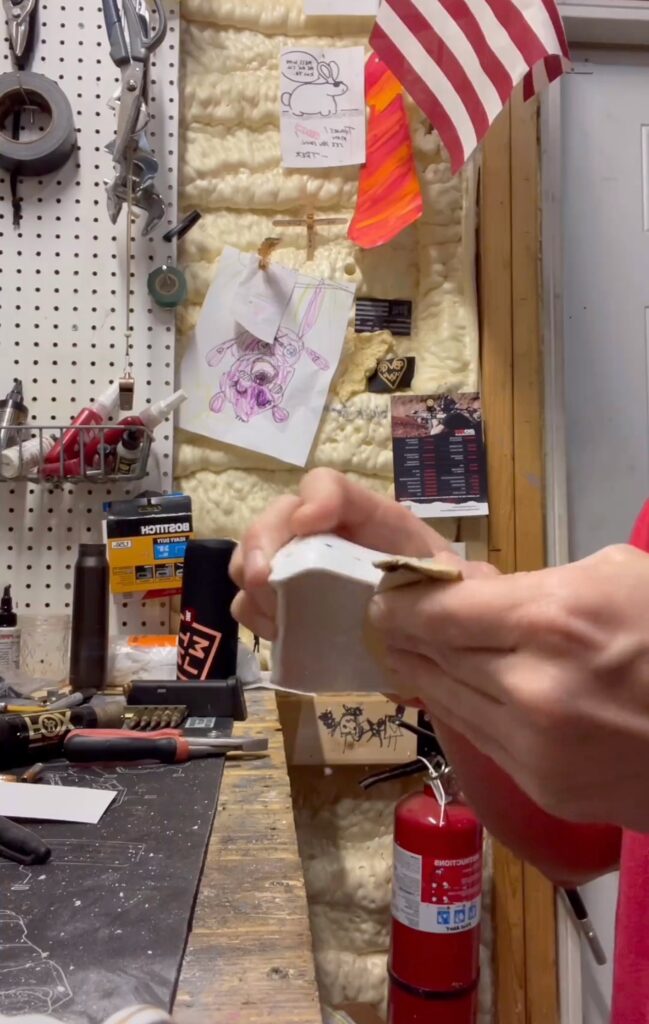
Once everything is cut, I sand down the edges with a fine grit sandpaper to ensure its smooth. Then I used instant glue, hold for 10-30 seconds and prop the nightlight up to dry for 24 hours. Once dry, you are ready to use it!

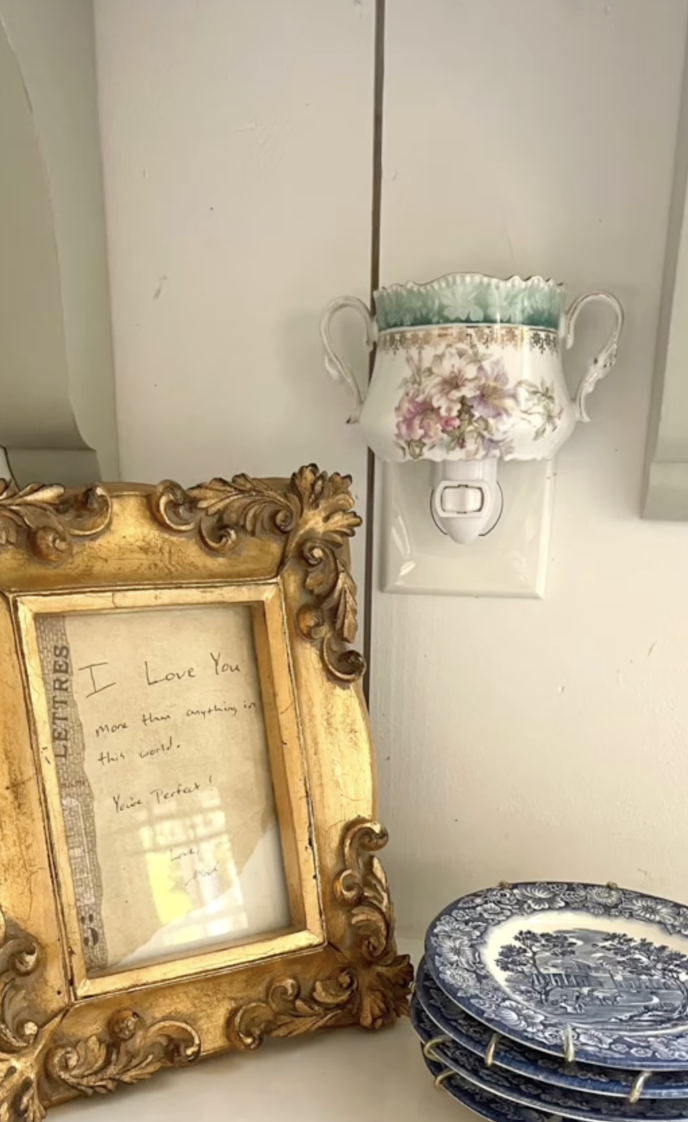
Where Are They Now?
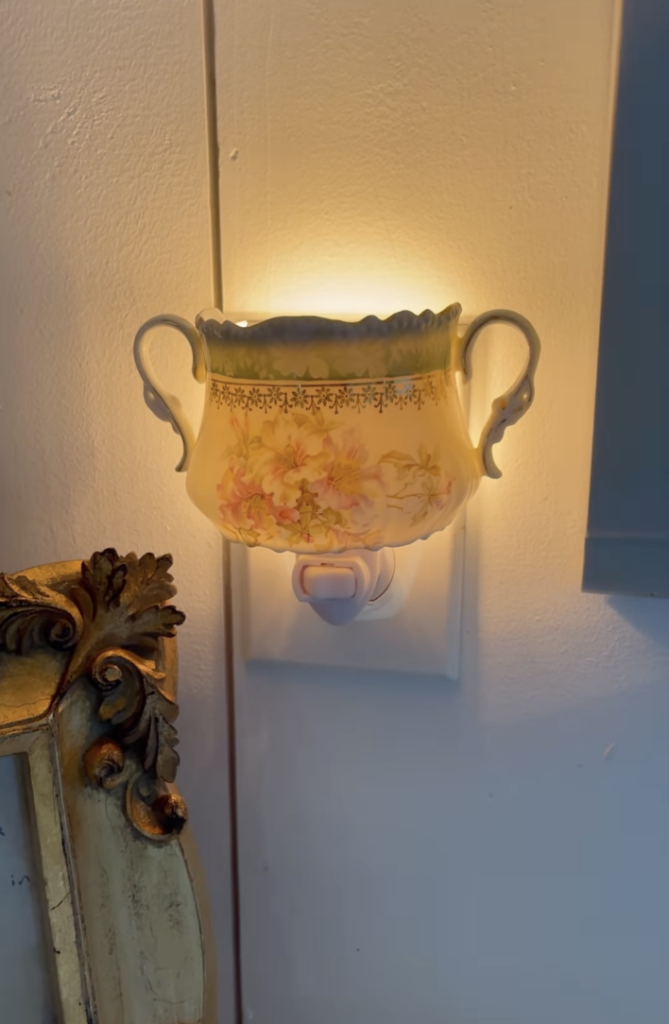
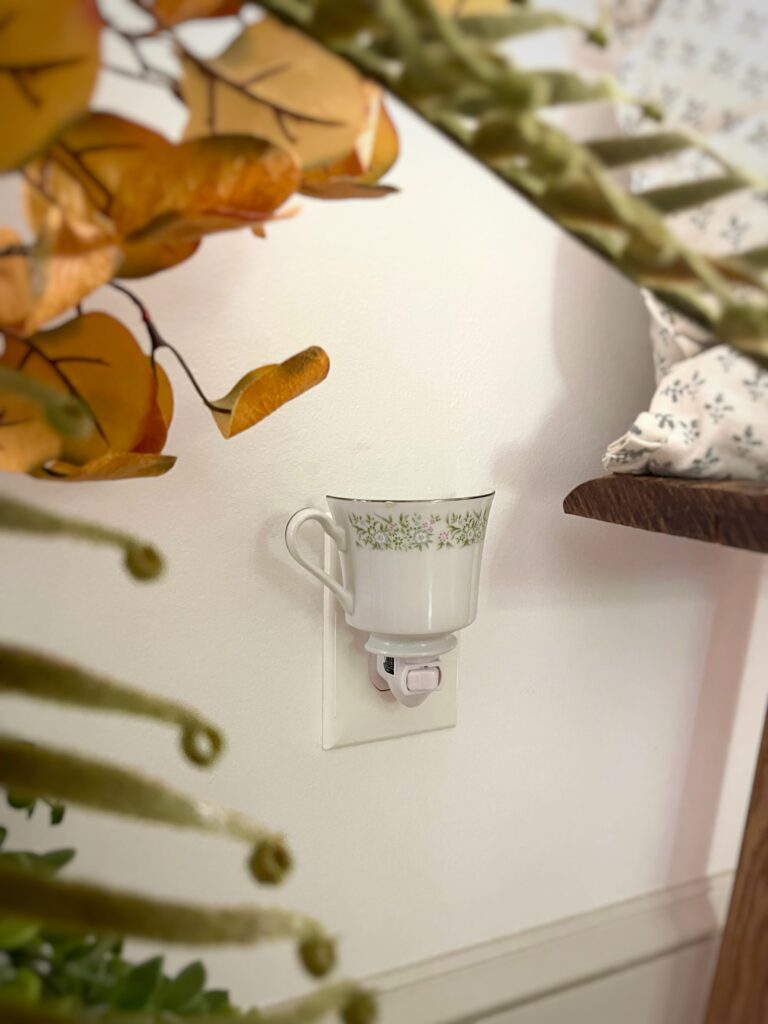
What do you think?? Have you used a nightlight like this? I love the soft light and vintage feel they give. I have one in my kitchen, I gave my sister one she uses in her kitchen and I also keep them for sale inside of our Airbnb.
If you’ve seen on my Instagram, as much as I loved doing this project and making them on a larger scale, I couldn’t keep up with the project. However, my sweet dad came to the rescue {as he often does}!
My dad is retired and decided he would like to take over making them, which I’m so excited about! He is currently working on a second big batch that will be for sale at a vintage shop in our town called Home Town Relics! We already dropped the first batch off to the shop and Sam, the owner shipped out quite a few! She sold the rest of them in the store and they seem to go quickly. Hopefully, my dad will have the next batch ready soon!
Here’s the Home Town Relics IG page if you want to inquire about purchasing through her shop. She ships! Thanks for supporting small shops and my dad! 😍


What type of blade do you use on your dremel to cut the cup in half? My sister us obsessed with Victorian style tea cups and her birthday is coming up. What a great gift idea.
Thank you
Cyndi