


How to Create a DIY Kitchen Wall Plate Rack
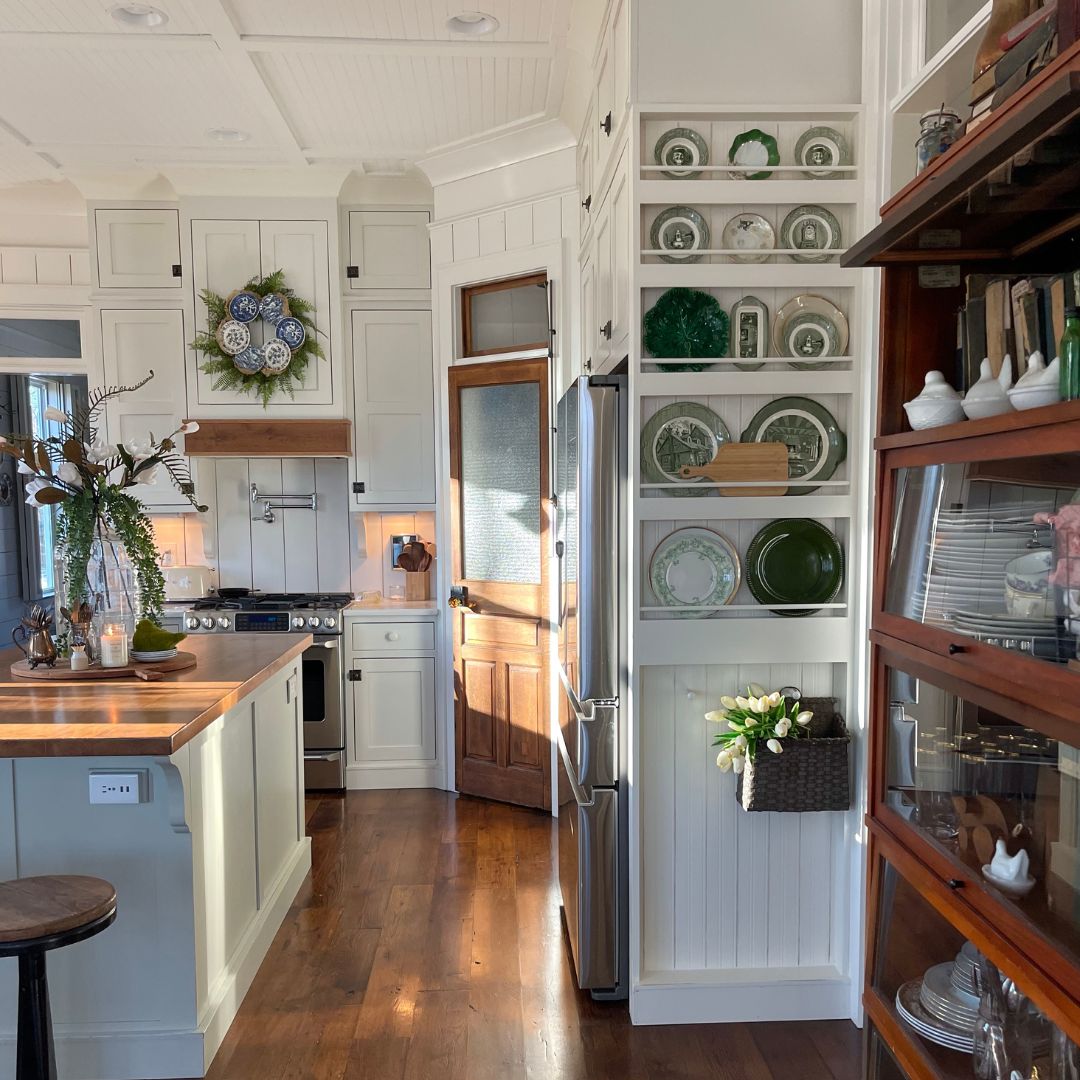
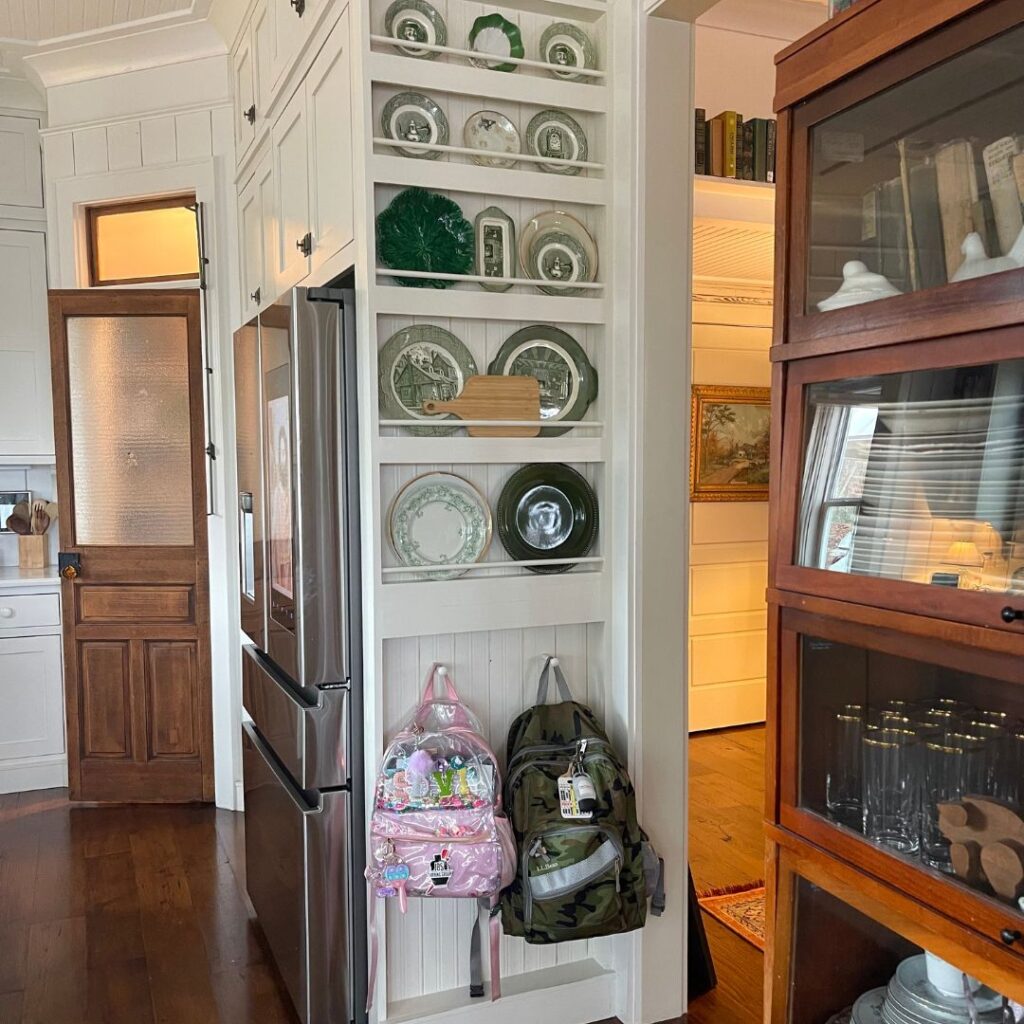
Today, I’m sharing my most recent project, a DIY Kitchen Wall Plate Rack that’s been a long time coming, honestly! From the day we moved in, I have always thought about creating something on the end cap of our kitchen where the fridge sits. Everyone in my family walks by this section of the kitchen multiple times a day so it naturally became a storage space for items you can hang quickly; backpacks, jackets, purse, etc. However, it still always felt like we could utilize it more. A DIY wall mounted plate rack was the perfect solution!

Wall Mounted Storage
A “Plate Rack” may feel a little too old school for some of you, but wall mounted storage is something we can all get behind! I mean, have you been to an IKEA? Those people know how to maximize space. DIY Plate Racks, or any wall mounted storage, can add both functionality and style to any space. Using vertical space for additional storage is far too often overlooked.
I am partial to the idea of the Plate Rack since I am such a fun of decorating with thrifted pretty plates. Decorating with plates is not only budget friendly and cute, but so easy to swap out for seasonal decor. I love me some pretty plates and the new rack allows me to use my dishware as a statement piece, especially when using all one color.

Functional Wall Mounted Design
The Plate Rack needed to both pretty and functional (as most of my projects are.) We use the end cap daily for the kids because we always end up doing school work at the kitchen island (read about my custom island here!) and we load up the bags for school each morning right there too.
Since we have lived here five years now and have always just the space so practically, I actually had a hard time finding a vision to create anything “pretty” out of the space. I’m not sure why it took me so long to realize I could make it attractive while still very functional for our family. It’s likely because my brain has been elsewhere with renovations and other house projects. Or maybe because sometimes these decisions shouldn’t be rushed and we need the patience to wait on that perfect idea? Feels like a metaphor for life, but I ain’t getting that deep about a Plate Rack over here. 😜 Anyway, this peanut brain finally came up with a solution that worked for our family!
How To: DIY Kitchen Wall Plate Rack
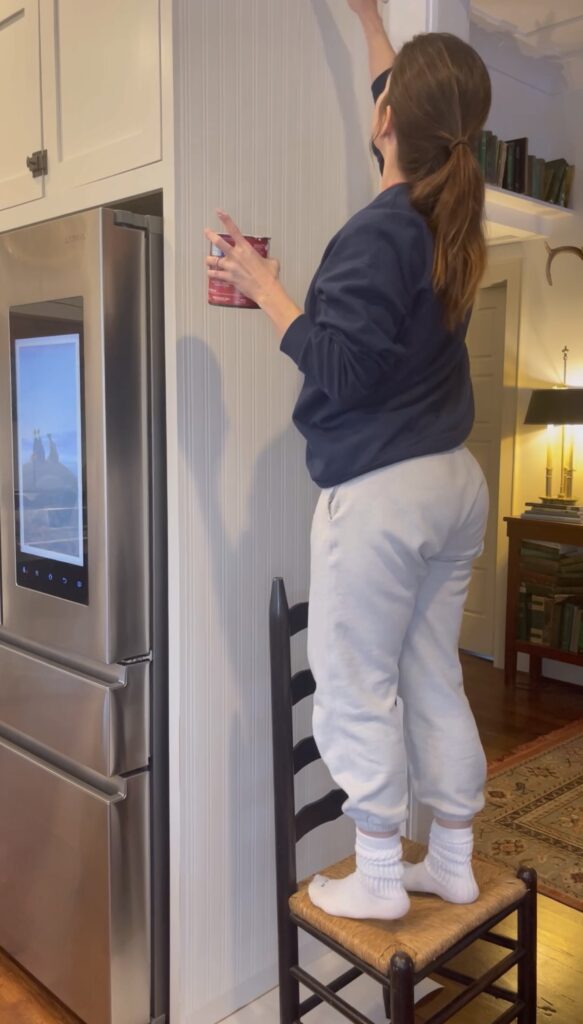
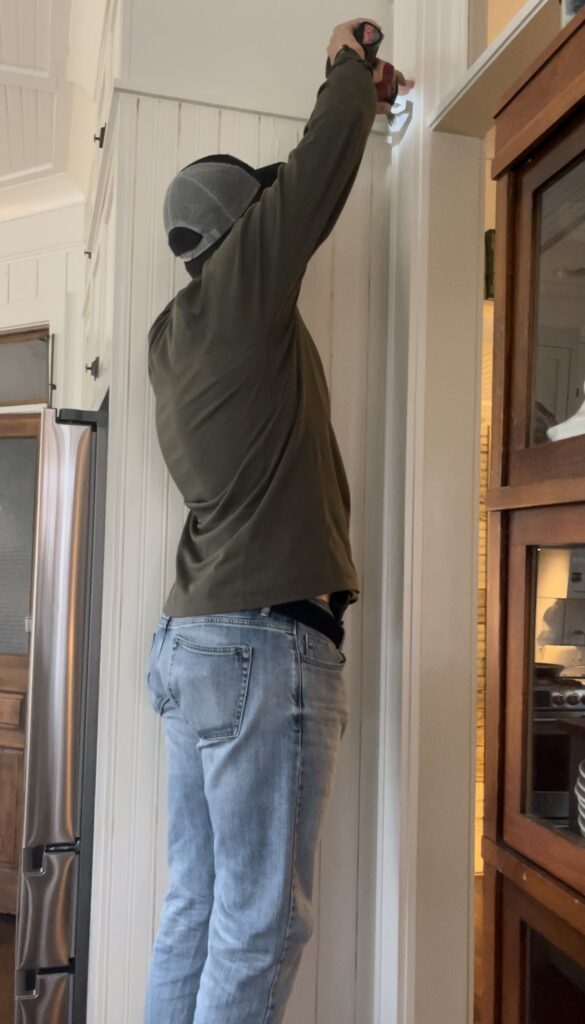
Since you came here for the How To, here ya go! If you don’t know already, my Dad is amazing and helps me with basically all my projects. I am convinced there isn’t something he can’t make or fix. I am a lucky girl! And, many times, I rope my sweet husband into helping me, but he doesn’t seem to love all my projects all the time for some reason. 😂
In total, it probably took me about a week to create this project. The part that took the longest was just waiting on the wood glue to dry and there isn’t much you can do about that. Pro Tip: If you are in a hurry, I would grab quick dry glue instead.
Supplies Used
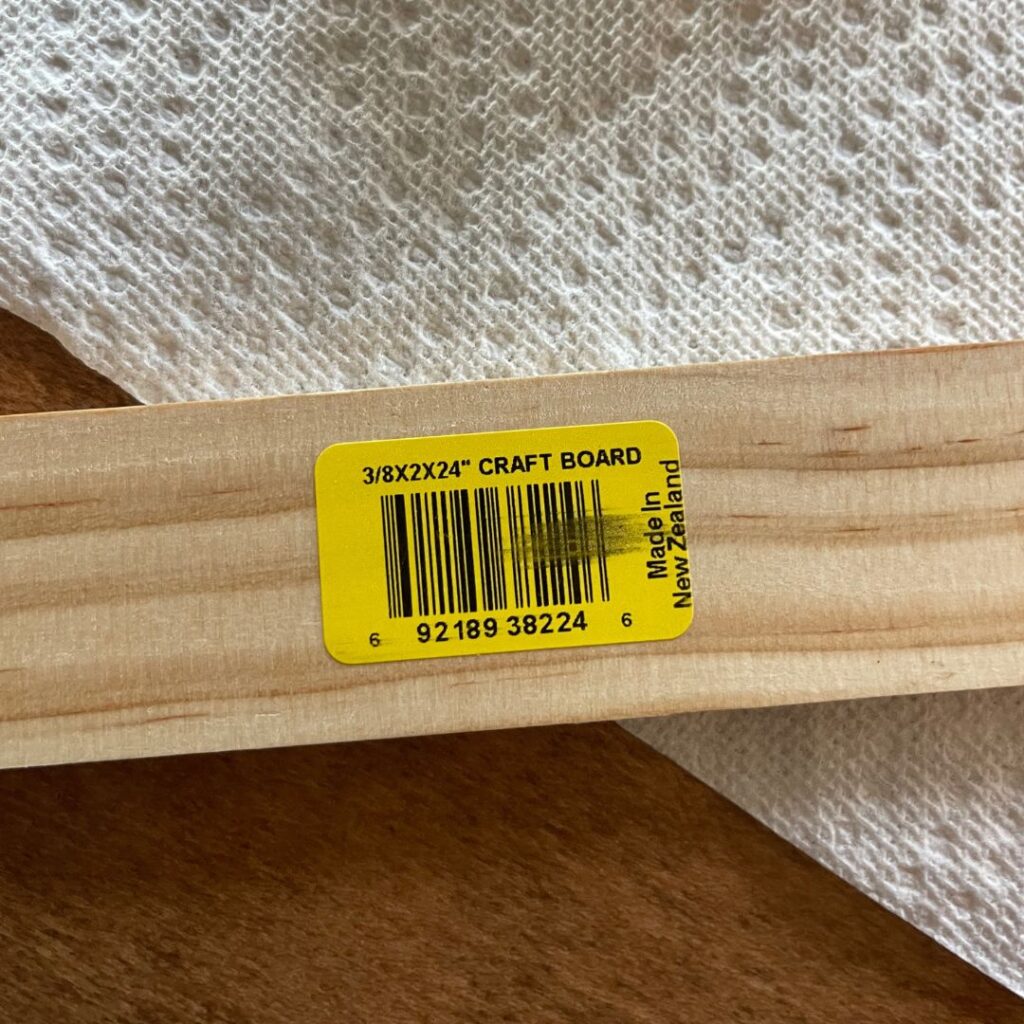
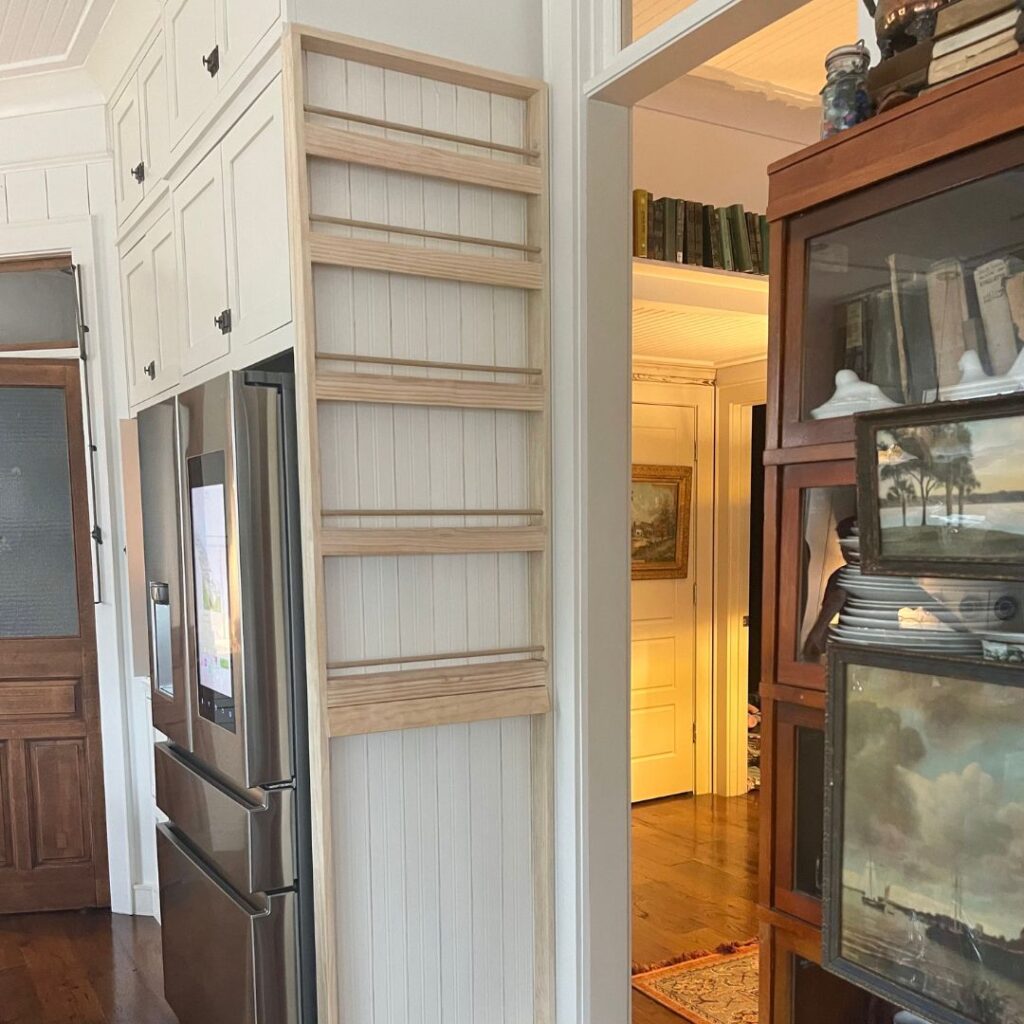
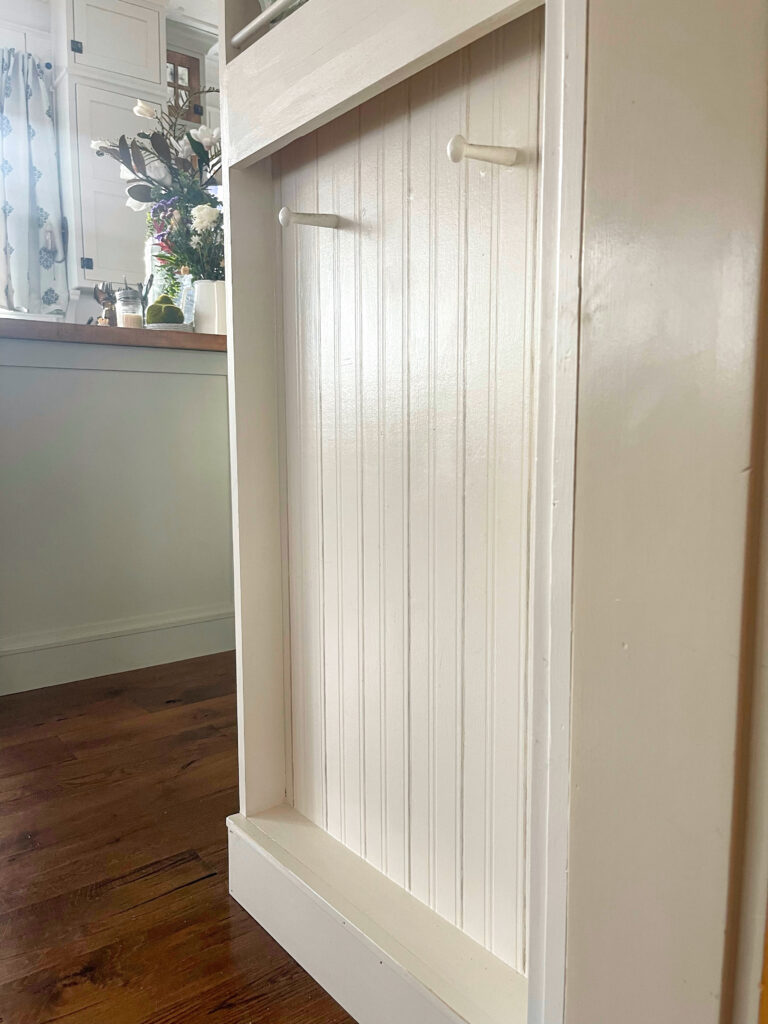
Can you believe I spent a grand total of $68.00 on all of the wood needed to frame it out? I used left over Bead Board wall paper for the backing, which in hindsight was a great call! I was working with such a small depth of wood so adding anything much thicker than bead board (which is nearly flat) would have either made the rack stick out further or take up space inside where the plates needed to rest.
My Plate Rack is 8 feet tall, just below my top cabinetry, which was exactly what I needed to fit the space and setup I was aiming for. I decided not to go all the way to the ceiling, because I didn’t want to draw the eye up so high.
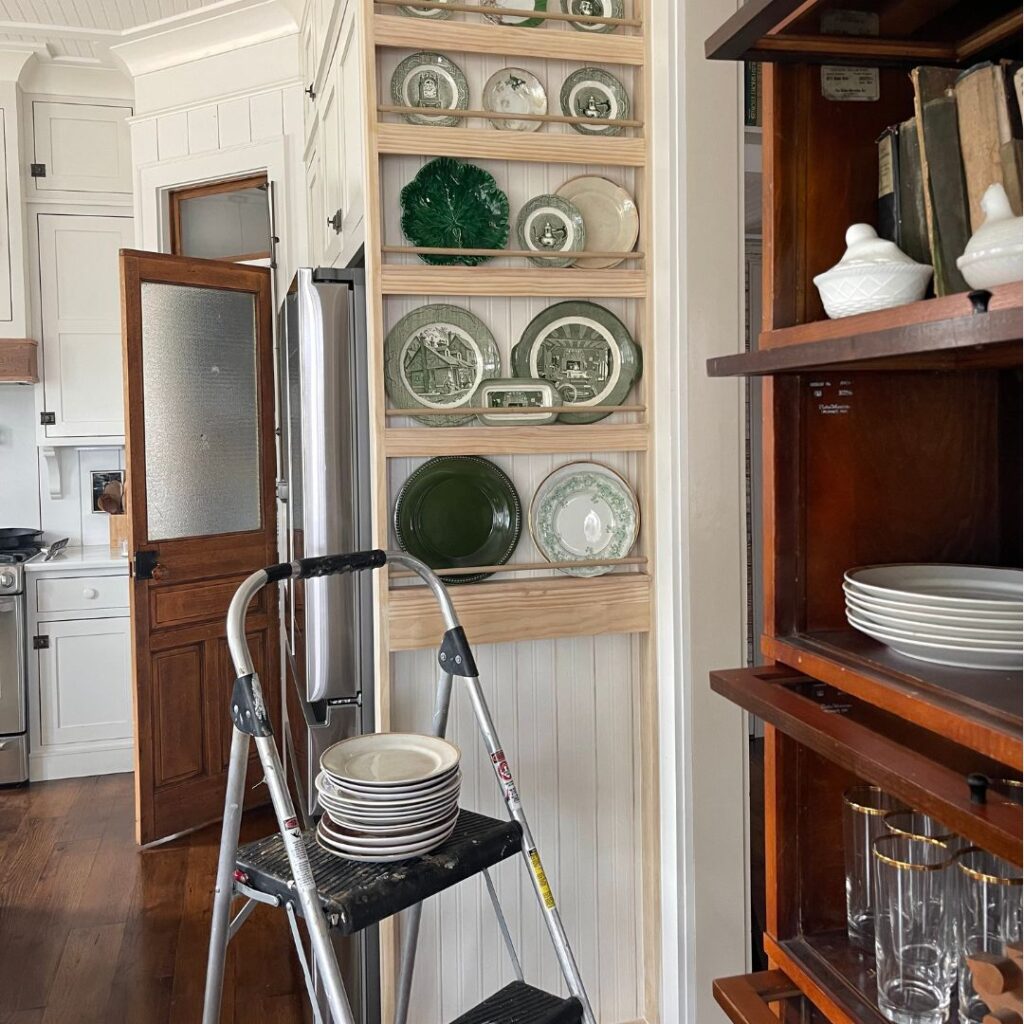
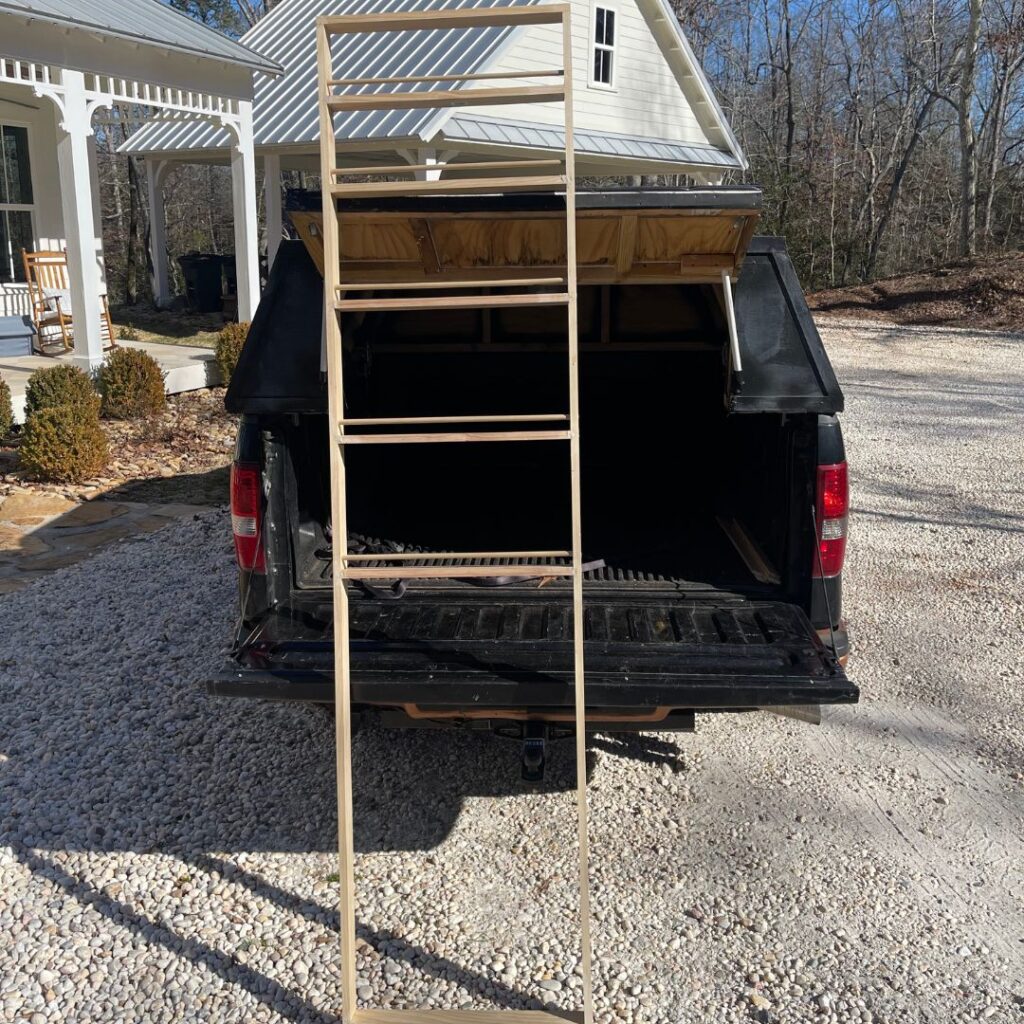
I used two 1x6x8 boards and five 1x3x2 boards for the shelving. We used five total 1/2″ dowel rods, and my Dad used a hole bit and his drill to cut out the little holes for the dowel rods to fit into. Pro Tip: Measure out the holes and bore all the holes first. We placed the dowels one inch above the shelving. However, if you have the space, I would move the dowel rod up at least another inch, especially for those larger platters.
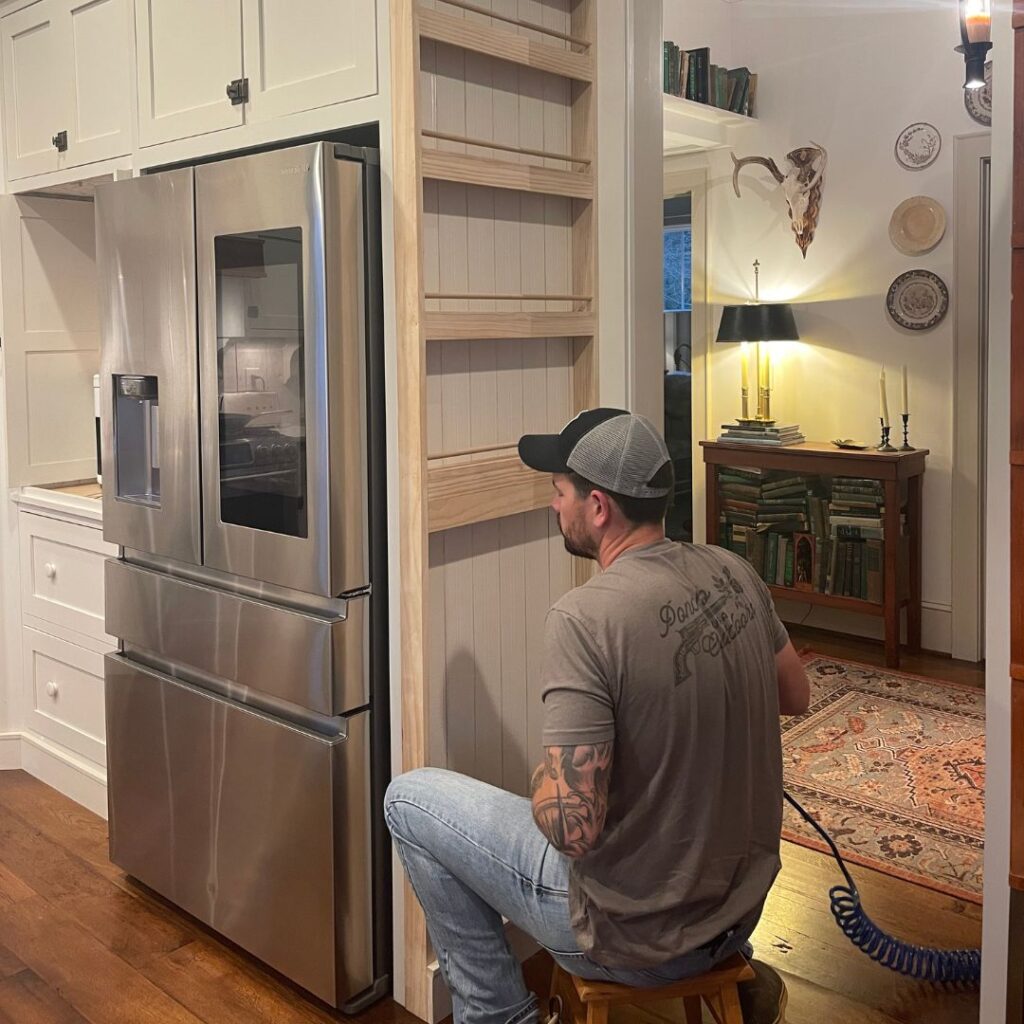
After boring the holes for the dowel rods, we attached them to one side of the framing with the glue. Then attach the other side by aligning those same holes and making sure everything is level… also using glue (that you wait to dry!)
Finishing the DIY Plate Rack
After the dowel rods are set, we cut the top and bottom pieces of the rack and attached them to the frame again with the trusty wood glue and a nail gun. Who knew all you needed was a few pieces of wood, glue and gun to make such a cute and functional piece? And a super special Dad and hubby, of course.
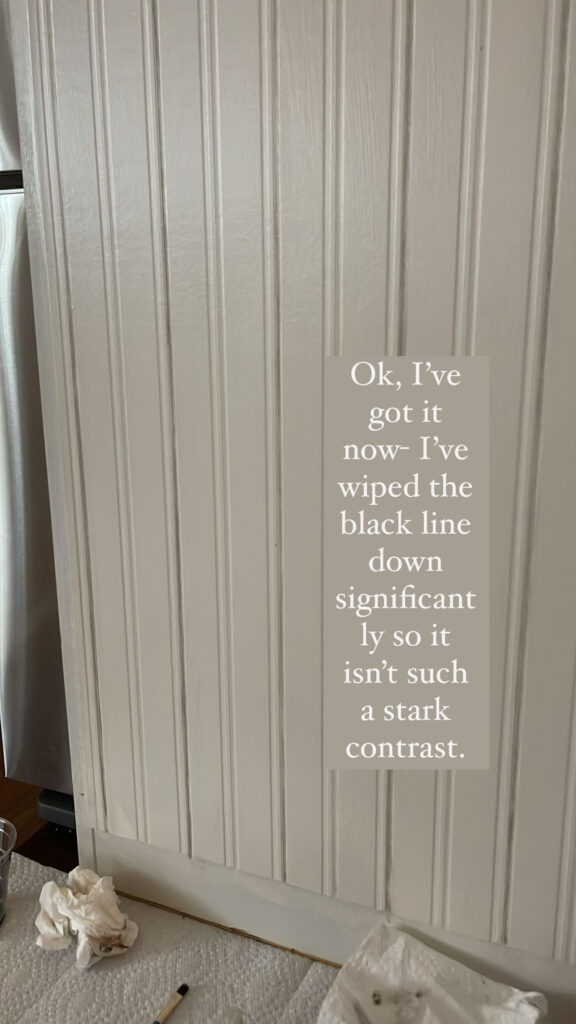
Isn’t that Bead Board so cute? It’s actually wallpaper from Walmart if you can believe it! To make it appear more realistic, I painted the grooves with a very faint black paint. This creates a faux shadow like you’d see in the tongue and groove joint of real wood bead board. It gives the final “historically inspired” element that I am always shooting for! I added these Wood Shaker Pegs for the kids’ backpacks and stuff.
All in all, I am really loving how this piece turned out and kicking myself for waiting so long. But, better late than never! I can’t wait to change it out seasonally and see all the ways we use it. I’d love to know if you have a Plate Rack in your home? Any fun ideas for how I can decorate it for Easter?


Hi Brittany!
I’m in LOVE with the plate rack wall. Such a precious addition to the space.❤️ Do you mind sharing the dimensions of the space of each shelf and the open space at the bottom? It’s all proportioned so well! Perfection!
Thank you and I am glad you love it! I used two 1x6x8 boards and five 1x3x2 boards for the shelving. We used five total 1/2″ dowel rods. It’s probably about 2 feet from the bottom
Bravo!
It truly looks professional & sweet all at the same time! It’s perfect! 💜